


How to Join PU Round Belts in 5 Minutes: A Step-by-Step Guide to On-Site Welding
Downtime hurts. A snapped belt on a conveyor line stops production cold. Workers stand around waiting for a replacement or a fix that takes hours. But with حزام حبل البولي يوريثان—often called PU round belt or PU cord—the game changes. You can weld it right there on the spot. No need to pull the whole system apart. No shipping to a shop. Just a quick heat-and-press job that gets you back up in minutes. This guide walks you through it step by step. We’ve pulled from real shop experience and the solid specs on these belts to make sure you get a strong, reliable joint every time.
Why PU Round Belts Beat Traditional Options for Quick Fixes
PU round belts run in packaging machines, printing presses, textile setups, ceramic lines, food processing gear, and material handling conveyors. They drive motors, spin parts, move products. When one breaks or stretches out, you want a fast repair.
Regular rubber belts? They crack, stretch too much, or need glue that never holds well. PU round belts resist abrasion way better. They handle oils, greases, and chemicals without breaking down. They stay flexible on small pulleys and in cold spots. Best part? Heat welding creates a seamless, endless loop. The joint becomes part of the belt—same strength as the rest. No weak links. No bumps that cause vibration.
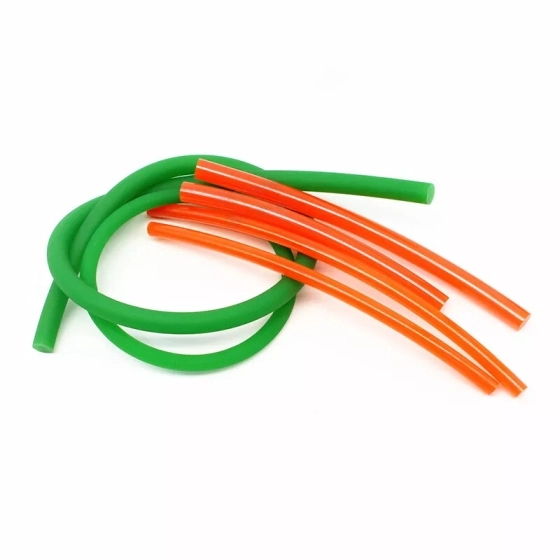
These belts come in diameters from 1.5mm up to 25mm, with common sizes like 3mm, 4mm, 5mm, 6mm, 8mm, and 10mm. Hardness sits at Shore A 70-85. You pick smooth for low-friction drive or rough for extra grip. Rolls usually come in 100m lengths, and colors match your setup needs.
In a busy packaging plant I know, a 6mm belt snapped during a night shift. Old-school fix meant waiting for morning delivery. They switched to PU round belts. Guy grabbed a basic welding kit, joined it in under five minutes. Line ran again before coffee got cold. Downtime dropped from hours to minutes.
Tools You Need for On-Site Welding
Keep it simple. You don’t need a fancy setup.
-
Sharp utility knife or scissors for clean cuts
-
PU belt welding tool (hot-melt clamp with heater or soldering iron style)
-
Alignment clamp or jig (many kits include this)
-
Heat-resistant gloves
-
Timer or watch
Basic kits cost reasonable and last years. Some use a heated blade or iron tip. Others have adjustable temp controls—aim for around 250°C for most ester-based PU.
Step-by-Step: How to Weld Polyurethane Cord Belt
Follow these steps. Practice once on scrap if you’re new. Safety first—work in a ventilated spot, wear gloves.
1. Measure and Cut to Length
Shut down the machine. Remove the old belt or measure the path. Add a little extra for the weld overlap if your method needs it, but most butt welds use straight ends.
Cut both ends dead square with a sharp blade. Crooked cuts make weak joints. A 90-degree flat face matters.
2. Prep the Ends
Clean off dust or oil with a rag. Rough ends weld poorly. If the belt’s dirty from food or grease, wipe it good.
3. Set Up the Welding Tool
Plug in or heat your tool. Let it reach temp—usually 8-10 minutes for irons, less for dedicated welders. Test on scrap if unsure.
Clamp one end in the alignment jig. Many tools have slots sized for your diameter.
4. Heat the Ends
Bring both ends close to the heat source. Melt them evenly. For a blade method, heat a flat metal piece red-hot, then melt each end against it for 10-30 seconds. Don’t burn it—just soften until gooey.
With clamp welders, fix both ends in place, then apply heat. Melt time varies by size—thicker 8mm takes longer than 4mm.
5. Join and Press
Quick—push the melted ends together firm. Align perfect in the clamp. Apply steady pressure. Excess material squeezes out as a bead.
Hold for 2-5 minutes while it cools. Don’t move it. The clamp acts as a heat sink too, speeding solidification.
6. Trim and Check
Once cool, trim any flash with a knife. Peel off the bead if it formed. Run your finger over the joint—should feel smooth, no bump.
Test by hand. Tug hard. A good weld holds like the belt itself.
Back on the machine. Spin by hand first. Listen for smooth run. Fire it up slow.
| Step | Time Estimate | Key Tip |
|---|---|---|
| Measure & Cut | 1 minute | Square cuts only |
| Prep Ends | 30 seconds | Clean is strong |
| Heat Tool | 5-10 minutes (setup) | Wait for full temp |
| Melt Ends | 10-30 seconds | Even melt, no scorch |
| Join & Hold | 2-5 minutes | Steady pressure |
| Trim & Test | 1 minute | Smooth joint = good |
Common Mistakes and How to Dodge Them
-
Uneven melt: One side hotter causes weak spots. Rotate or use even heat.
-
Too much pressure: Squeezes material out, thins the joint. Firm, not crushing.
-
Moving too soon: Cooling takes time. Rush it, joint fails under load.
-
Wrong temp: Too low—no bond. Too high—degrades PU. Stick near 250°C.
-
Dirty ends: Oil or dust ruins adhesion. Wipe always.
In textile plants, I’ve seen guys skip cleaning. Joint pops in a week. Clean ones last months, sometimes years.
When to Use PU Round Belts and Why On-Site Welding Wins
These belts shine in automation, conveyors, drive systems where downtime kills output. Quick welding means no full teardown. Replace or shorten in place. For food lines, smooth joints mean less catch points, easier clean.
Abrasion resistance cuts replacements. Oil resistance handles greasy environments. Flexibility on small pulleys fits tight machines.
Introducing Aisili Pneumatic

As a professional manufacturer dedicated to the development and production of polyurethane pneumatic tubing and related pneumatic materials, Aisili الهوائية has been at it since 2007. With two factories in Shandong Province and seven advanced extrusion lines, they churn out top-notch solutions for robotics, automotive, and packaging industries. Their focus on high-quality raw materials, customization via OEM and ODM, and adherence to global standards has them shipping to over 30 countries. It’s all about reliable, durable products that keep your operations running smooth.
Conclusion
Joining Polyurethane Cord Belt on-site takes practice but saves big time and hassle. A five-minute weld gets your line back fast—no waiting for pre-made endless belts. The joint matches the belt’s strength, thanks to that easy heat-melt feature. Grab the right tool, follow the steps, and you’ll handle breaks quick. Your machines stay up, production flows, and headaches drop.
FAQs
How long does a proper weld on Polyurethane Cord Belt actually take?
From cut to ready, most folks finish in 5 minutes once the tool’s hot. Melting takes 10-30 seconds, cooling 2-5 minutes under clamp. Setup adds a bit, but on-site it’s way faster than swapping whole belts.
What diameter sizes work best for quick on-site welding of Polyurethane Cord Belt?
Common sizes like 3mm to 8mm weld easiest with basic kits. Up to 10mm or even 16mm works fine too. Thicker ones (over 10mm) need longer heat and hold times, but the process stays the same.
Do I need special tools to join Polyurethane Cord Belt, or can I improvise?
A dedicated PU welding kit helps most—clamp and heater make alignment easy and joints strong. Improvise with a hot blade and jig if you’re careful, but kits cut mistakes and speed things up in real shop conditions.
Will the welded joint on Polyurethane Cord Belt hold up under heavy load or oily conditions?
Yes—when done right, the weld becomes seamless and matches the belt’s high tensile strength and oil resistance. It handles abrasion, chemicals, and repeated flex like the rest of the belt. Weak joints usually come from poor prep or rushing cool time.
Can I shorten or repair an existing Polyurethane Cord Belt loop without removing it from the machine?
That’s the big win. Cut out the bad section, weld in a new piece, or just re-join ends. No full disassembly needed in most conveyors or drives. Keeps downtime minimal in packaging or printing setups.