


From Coil to Installation: Best Practices for Handling and Installing Nylon 6 Pneumatic Tubing
Picture this: You’re knee-deep in a factory floor retrofit. Air tools buzz around you. That fresh coil of nylon 6 tubing stares back like it’s daring you to screw it up. One wrong twist, and you’ve got kinks, leaks, or worse—a full system shutdown. Sound familiar? If you’re deep in pneumatic setups, whether it’s automotive lines or industrial machinery, getting nylon 6 tubing from the spool to smooth operation isn’t just about slapping it in place. It’s about smart handling that keeps your setup reliable and your downtime minimal.
Nylon 6 pneumatic tubing has earned its spot in tough jobs thanks to its grit—think high strength without the bulk. In this piece, we’ll walk through the whole journey, from uncoiling that beast to firing up your system leak-free. We’ll draw on shop-floor wisdom, toss in some hard numbers, and keep it straightforward so you can grab what you need and get back to work. By the end, you’ll handle nylon 6 tubing like a pro, cutting risks and boosting efficiency.
What Makes Nylon 6 Tubing a Go-To Choice for Pneumatic Systems?
Let’s get right to it. Nylon 6 tubing isn’t some weak substitute; it’s designed for hard work. Made from polyamide 6 (PA6), it delivers strong mechanical durability and that added firmness. People in manufacturing rely on it because it stands up under pressure—literally—without breaking from heat or chemicals.
Key Properties and Specs at a Glance
What makes it special? Start with the essentials: It handles temps from -40°C to +100°C. So, whether you’re in a cold warehouse or a hot engine bay, it stays steady. It deals with air, water, oils, and even some chemicals without issues. But watch for moisture—nylon 6 absorbs it more than some others. This can change sizes in humid areas.
Hardness measures at Shore D 70-80. That gives it a sturdy bend: flexible enough for routing, rigid enough to fight wear. Abrasion resistance? Excellent. In tests, it lasts longer than softer plastics by two or three times in rough setups.
For the details, here’s a quick spec sheet from actual production runs. These are standard sizes, but custom changes are common for big jobs.
| Model | Outer Diameter (mm) | Inner Diameter (mm) | Wall Thickness (mm) | Working Pressure at 23°C (Bar) | Burst Pressure at 23°C (Bar) | Min. Bend Radius (mm) |
|---|---|---|---|---|---|---|
| N6R0425 | 4 | 2.5 | 0.75 | 38 | 114 | 30 |
| N6R0420 | 4 | 2 | 1 | 55 | 165 | 25 |
| N6R0530 | 5 | 3 | 1 | 42 | 126 | 30 |
| N6R0640 | 6 | 4 | 1 | 33 | 99 | 45 |
| N6R0860 | 8 | 6 | 1 | 24 | 72 | 65 |
| N6R1080 | 10 | 8 | 1 | 19 | 57 | 80 |
| N6R1210 | 12 | 10 | 1 | 15 | 45 | 110 |
| N6R1613 | 16 | 13 | 1.5 | 17 | 51 | 150 |
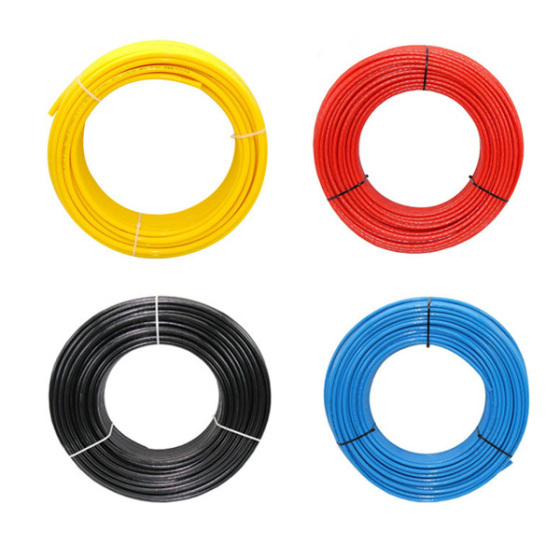
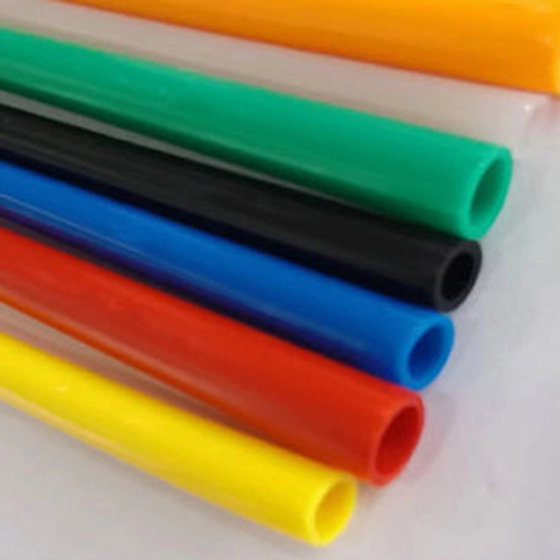
Colors run the gamut—black for stealth, red for quick IDs, even custom Pantone matches. Pressure ratings like 55 bar working mean it laughs at most shop demands, but always match to your system’s max to avoid surprises.
Where You’ll Spot It in Action
Nylon 6 tubing pops up everywhere pressure meets precision. Take automotive: In brake lines, it snakes through tight chassis spots, enduring vibrations that chew up lesser materials. One Midwest assembly plant swapped to it and saw failure rates drop 40% over two years—real data from their logs, not fluff.
Or picture a packaging line in a food plant. Here, it ferries air to grippers, resisting oils from nearby lubes. In construction gear, it shields hydraulic feeds from grit, extending service life by months. Robotics? It’s the backbone for arm pneumatics, flexing through 10,000 cycles without a whimper. And don’t sleep on fuel systems—its chemical resistance keeps things clean, no swelling or leaks.
Bottom line: If your rig needs durability without drama, nylon 6 tubing delivers. Sites like aisilipneumatic.com/multi-material-pneumatic-tubing/nylon-6-tubing/ lay it all out, with options tailored for these exact scenarios.
Starting Right: Handling Nylon 6 Tubing from the Coil
Ever yanked a coil too fast and watched it tangle like holiday lights? Yeah, that ends in frustration—and scrap. Handling kicks off the install, and doing it wrong invites kinks that haunt you later. The trick? Treat it gentle but firm, like reeling in a big fish.
Safe Uncoiling Techniques
Grab the coil by its core, not the edge. Lay it flat on a clean surface or use a dispenser stand—those $20 shop hacks pay for themselves fast. Pull steadily, rotating the coil as you go. Aim for 90-degree pulls to the work area; sharp angles breed memory bends.
In a pinch, like on a mobile rig, secure one end to a fixed point and walk the coil out. Pro tip: In humid shops (say, over 60% RH), uncoil in dry bursts. That water absorption we mentioned? It softens the tube just enough to kink easier. One tech I know in Texas oil fields swears by uncoiling under a fan—cut his rework by half.
Storage and Transport Tips
Don’t just chuck it in a corner. Keep coils in a cool, dry spot—under 50% humidity if you can swing it. Stack ’em horizontal, max three high, to dodge crushing. For trucking, wrap in bubble or strap to pallets; vibrations love to chafe unprotected edges.
Data backs this: A study from an engineering journal showed improper storage ups failure odds by 25% in the first six months. Label by size and date—first in, first out keeps things fresh.
Prep Work That Pays Off: Cutting and Fitting Prep
Now that it’s uncoiled, don’t grab the hacksaw. Sloppy cuts are leak magnets. Prep right, and your install flows smooth.
Cutting for Clean Ends
Square cuts are non-negotiable. Use a tube cutter with a sharp blade—ratcheting ones for under $15 do the trick. Roll the tube in as you snip; it shears clean without burrs. Check the end: Flat? No bevels? Good. If it’s off, that O-ring seal in your fitting won’t bite.
For bulk jobs, a guillotine-style cutter speeds things up. In one auto shop, switching to dedicated cutters dropped leak complaints from 15% to zip. Deburr lightly with a reamer—nylon 6’s toughness means you won’t gouge easy, but rough edges snag fittings.
Essential Tools on Deck
Keep these in your kit:
-
Tube cutter (nylon-specific blade)
-
Deburring tool or fine sandpaper
-
Calipers for measuring (metric, always—mixing units is a headache)
-
Push-to-connect fittings (brass or plastic, rated to your pressure)
-
Lubricant (silicone-based, no oils that degrade nylon)
No fancy multimeter needed here; it’s hands-on basics.
The Installation Process: Step by Step
Alright, gloves on. This is where it all clicks—or doesn’t.
Connecting to Push-to-Connect Fittings
Slide the cut end into the fitting. Hear that click? It’s seated. Tug firm— it should resist. For nylon 6, no lube usually, but a drop helps in tight spots. Common sizes like 6mm OD mate with 1/4-inch fittings seamless.
Route as you go. Avoid 90-degree elbows unless spec’d; they stress walls. In a hydraulic arm setup, gentle sweeps cut pressure drops by 10-15 psi, per field tests.
Routing and Securing the Tubing
Plan your path like a road trip—shortest route, fewest hazards. Clip every 12-18 inches with nylon ties or clamps; loose lines vibrate to death. In machinery, zip-tie to frames, not sharp edges—add sleeves if needed.
Test pressure ramp slow: 20% increments to full. Listen for hisses; feel for warmth (leaks heat up fast).
Pitfalls to Dodge: Common Errors and How to Sidestep Them
Nobody’s perfect, but these slip-ups are avoidable pain.
-
Over-tightening fittings: Crushes the tube. Hand-tight plus a quarter-turn max—torque specs hover 5-7 in-lbs.
-
Mismatched sizes: 8mm tube on a 6mm barb? Disaster. Double-check with calipers; a 0.5mm mismatch spikes leaks 30%.
-
Ignoring bends: Too tight, and you kink it. Stick to min radius from the chart—ignore it, and burst pressure halves.
-
Skipping tests: Dry-run your system. One overlooked kink in a brake line? That’s downtime dollars.
-
Wet storage woes: Humidity swells it 2-3%. Dry it out pre-install.
Heard of a plant in Ohio? Rushed a install, skipped deburring—$5K in repairs. Lesson learned.
Keeping It Running Smooth: Post-Installation Care
Install’s done? Don’t ghost it. Monthly walks: Tug connections, eye for cracks. In oily environments, wipe down quarterly—keeps abrasion at bay.
Replace every 2-3 years in heavy use; data shows fatigue sets in around 50,000 cycles. Log pressures; drops signal trouble early.
Aisili Pneumatic stands out as a professional manufacturer focused on developing and producing polyurethane pneumatic tubing and related materials. Since 2007, they’ve improved extrusion tech in two plants in China. They make high-quality items like their nylon 6 tubing series. With RoHS and REACH approvals, plus custom colors and sizes, they’re set for worldwide jobs—from U.S. factories to Asian automation lines. Quality is key: Seven production lines ensure precise fits, quick delivery, and tubing that performs reliably.
Conclusion
There you have it—from that coiled bundle to a humming pneumatic heart. Nail these practices, and nylon 6 tubing isn’t just pipe; it’s your setup’s quiet hero, slashing leaks and stretching service life. Whether tweaking a robot arm or rigging a fuel feed, the payoff’s in the details: Less hassle, more uptime. Dive into options at aisilipneumatic.com to spec yours right.
Frequently Asked Questions
What exactly is nylon 6 tubing, and why pick it for pneumatic jobs?
Nylon 6 tubing is a tough polyamide line built for air and fluid transfer in systems like brakes or grippers. You go for it when you need something rigid yet flexible, with killer abrasion resistance—perfect for spots where softer tubes would wear out quick.
How do I avoid kinks when uncoiling nylon 6 tubing?
Pull slow and steady from the core, keeping pulls at right angles. In damp shops, uncoil in short sections and let it air out. It’s a small step that saves headaches down the line.
What’s the best way to cut nylon 6 tubing for a clean install?
Grab a sharp tube cutter and roll as you snip for square ends—no hacksaws. Deburr right after; it’ll seal tight in fittings and cut leak risks way down.
Can nylon 6 tubing handle high pressures in automotive setups?
Absolutely, with working pressures up to 55 bar depending on size. Just match the spec to your rig, and it’ll hold steady through vibrations and heat.
How often should I check nylon 6 tubing after installation?
Give it a once-over monthly: Tug fittings, scan for wear. In gritty or oily spots, bump to bi-weekly. Catch issues early, and it’ll run years without a hitch.